タイマーが0になったら画像を表示させる
前回書いた記事で、Android端末の音量の設定を取得して、それに合わせたアラーム音をSoundPoolで鳴らした。今回はカップ麺タイマーの機能にはあまり関係ないが、タイマーが0になったら画像を表示させてみたいと思う(毎回ブログのサムネも変わり映えしなくて寂しいので…笑)
画像を表示させる方法は色々とあるみたいだけど、今回はシンプルにdrawableに置いた画像をImageViewで表示させる方法で画像を表示させてみる。また、タイマーが0になったときだけ表示させたいので、ImageViewのVISIBLE、INVISIBLEの属性をKotlinのコードで制御して表示、非表示を切り替えた。もっと良い方法がある気もするが、ひとまず私がやった方法をまとめておく。
環境
開発PC環境
Windows 10
Android Studio 4.1.1
実行Android環境
機種:Xperia X Performance SOV33
Androidバージョン:7.0
画像ファイル(jpg)の置き場所とlayoutへの配置
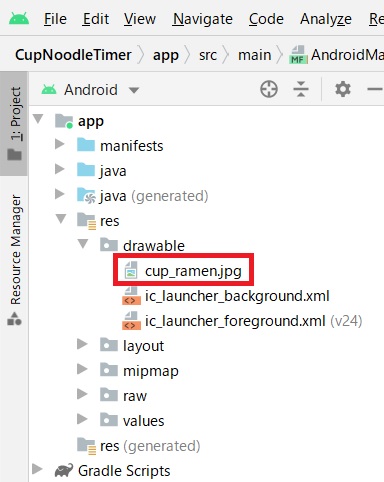
今回はイラストACのこちらの画像を使わせて頂いた。ダウンロードしたjpegファイルをresフォルダ以下に「drawable」というフォルダに置く。
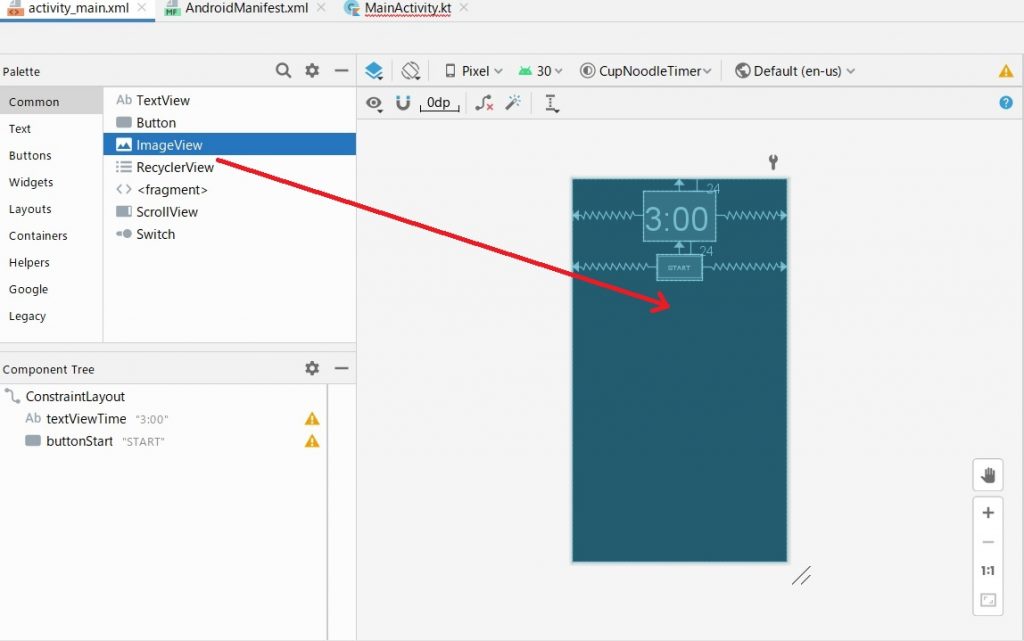
ImageViewをレイアウトに配置するにはactivity_main.xmlに直書きしても良いが、今回はAndroid StudioのGUIから配置してみる。レイアウトを開いてImageViewをボタンの下あたりにドラッグ&ドロップ。
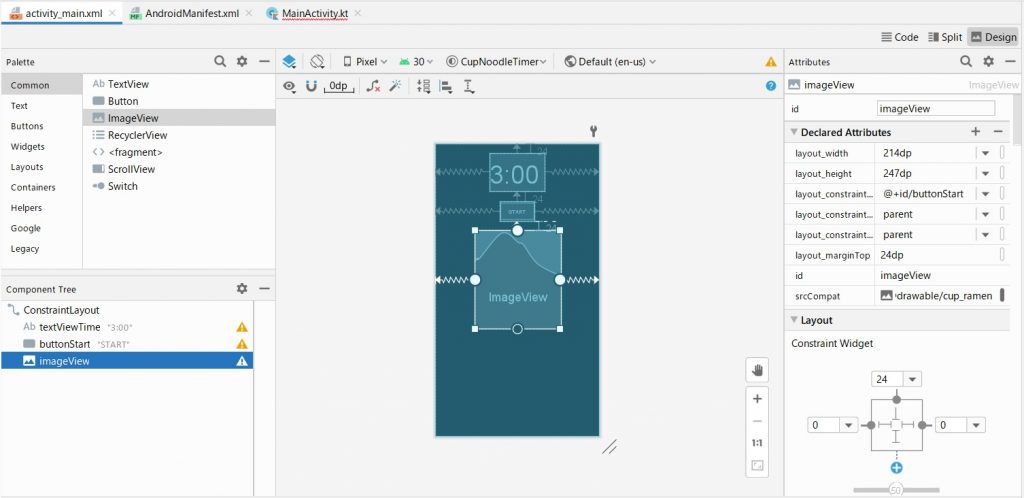
以下のように今回使用する画像に合わせて適当にサイズを合わせて配置した。idはデフォルトのままimageViewとした。あとでこのidをKotlinのコードで指定して画像を制御する。
配置後のxmlは以下のようになった。最初からxmlを直書きしてもOK。
<?xml version="1.0" encoding="utf-8"?> | |
<androidx.constraintlayout.widget.ConstraintLayout xmlns:android="http://schemas.android.com/apk/res/android" | |
xmlns:app="http://schemas.android.com/apk/res-auto" | |
xmlns:tools="http://schemas.android.com/tools" | |
android:layout_width="match_parent" | |
android:layout_height="match_parent" | |
tools:context=".MainActivity"> | |
<TextView | |
android:id="@+id/textViewTime" | |
android:layout_width="wrap_content" | |
android:layout_height="wrap_content" | |
android:layout_marginTop="24dp" | |
android:text="3:00" | |
android:textSize="72sp" | |
app:layout_constraintEnd_toEndOf="parent" | |
app:layout_constraintStart_toStartOf="parent" | |
app:layout_constraintTop_toTopOf="parent" /> | |
<Button | |
android:id="@+id/buttonStart" | |
android:layout_width="wrap_content" | |
android:layout_height="wrap_content" | |
android:layout_marginTop="24dp" | |
android:text="START" | |
app:layout_constraintEnd_toEndOf="parent" | |
app:layout_constraintHorizontal_bias="0.498" | |
app:layout_constraintStart_toStartOf="parent" | |
app:layout_constraintTop_toBottomOf="@+id/textViewTime" /> | |
<ImageView | |
android:id="@+id/imageView" | |
android:layout_width="214dp" | |
android:layout_height="247dp" | |
android:layout_marginTop="24dp" | |
app:layout_constraintEnd_toEndOf="parent" | |
app:layout_constraintStart_toStartOf="parent" | |
app:layout_constraintTop_toBottomOf="@+id/buttonStart" /> | |
</androidx.constraintlayout.widget.ConstraintLayout> |
Kotlinのコード
まず、先ほどレイアウトで配置したimageViewをfindViewByIDで取得する。R.id.XXのXXの部分にレイアウトのidを指定する。定義したimageViewに画像をセットするには、setImageResourceで、drawableの画像(cup_ramen)を指定して表示させる。
val imageView = findViewById(R.id.imageView) imageView.setImageResource(R.drawable.cup_ramen)
これで画像は表示できるのだが、これだけだと常に画像が表示される状態になる。imageViewに表示させた画像の表示、非表示を切り替えたい場所で以下のコードを入れる。VISIBLEが表示状態で、INVISIBLEが非表示状態。
imageView.visibility = View.VISIBLE imageView.visibility = View.INVISIBLE
カップ麺タイマーのコードでは以下のようにした。あまりスマートな書き方ではない気がするが、まず画像を読み込んでおいてすぐにINVISBLEにして、タイマーが0になったときだけVISIBLEにして画像を表示させるようにしている。
package com.example.cupnoodletimer | |
import android.content.Context | |
import android.media.AudioAttributes | |
import android.media.AudioManager | |
import android.media.SoundPool | |
import android.os.* | |
import android.view.View | |
import android.widget.Button | |
import android.widget.ImageView | |
import android.widget.TextView | |
import androidx.annotation.RequiresApi | |
import androidx.appcompat.app.AppCompatActivity | |
class MainActivity : AppCompatActivity() { | |
val TIMERTIME: Long = 180000; | |
lateinit var timerText: TextView | |
lateinit var timer: CountDownTimer | |
var isRunning: Boolean = false; | |
lateinit var soundPool: SoundPool | |
var soundAlarm = 0 | |
@RequiresApi(Build.VERSION_CODES.LOLLIPOP) | |
override fun onCreate(savedInstanceState: Bundle?) { | |
super.onCreate(savedInstanceState) | |
setContentView(R.layout.activity_main) | |
val startButton: Button = findViewById(R.id.buttonStart) | |
val vibrator = getSystemService(Context.VIBRATOR_SERVICE) as Vibrator | |
val audioAttributes = AudioAttributes.Builder() | |
.setUsage(AudioAttributes.USAGE_ALARM) | |
.setContentType(AudioAttributes.CONTENT_TYPE_SPEECH) | |
.build() | |
soundPool = SoundPool.Builder() | |
.setAudioAttributes(audioAttributes) | |
.setMaxStreams(1) | |
.build() | |
val imageView = findViewById<ImageView>(R.id.imageView) | |
imageView.setImageResource(R.drawable.cup_ramen) | |
imageView.visibility = View.INVISIBLE | |
startButton.setOnClickListener { | |
if (isRunning) { | |
timer.cancel() | |
setTime(TIMERTIME) | |
isRunning = false | |
startButton.text = "START" | |
imageView.visibility = View.INVISIBLE | |
} else { | |
soundAlarm = soundPool.load(this, R.raw.alarm, 1) | |
timer = object : CountDownTimer(TIMERTIME, 1000) { | |
override fun onTick(millisUntilFinished: Long) { | |
setTime(millisUntilFinished) | |
} | |
override fun onFinish() { | |
setTime(0) | |
isRunning = false | |
startButton.text = "RESTART" | |
if (android.os.Build.VERSION.SDK_INT >= android.os.Build.VERSION_CODES.O) { | |
val vibrationEffect = VibrationEffect.createOneShot(5000, VibrationEffect.DEFAULT_AMPLITUDE) | |
vibrator.vibrate(vibrationEffect) | |
} else { | |
vibrator.vibrate(5000) | |
} | |
val am = getSystemService(Context.AUDIO_SERVICE) as AudioManager | |
val alarmVol: Float = am.getStreamVolume(AudioManager.STREAM_RING).toFloat() | |
var alarmMaxVol: Float = am.getStreamMaxVolume(AudioManager.STREAM_RING).toFloat() | |
var setVol: Float = (alarmVol / alarmMaxVol).toFloat() | |
soundPool.play(soundAlarm, setVol, setVol, 0, 0, 1.0f) | |
imageView.visibility = View.VISIBLE | |
} | |
} | |
timer.start() | |
isRunning = true | |
startButton.text = "RESET" | |
imageView.visibility = View.INVISIBLE | |
} | |
} | |
} | |
private fun setTime(t: Long) { | |
timerText = findViewById(R.id.textViewTime) | |
var time: Long = t | |
var minutes: Long = (time / 1000) / 60 | |
var seconds: Long = (time / 1000) % 60 | |
timerText.setText("%d:%02d".format(minutes, seconds)) | |
} | |
} |
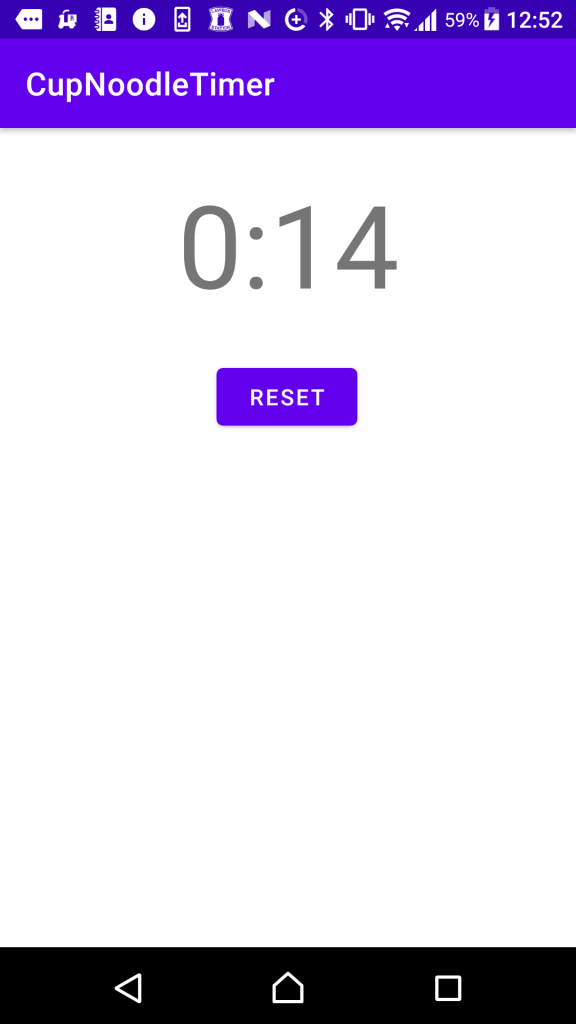
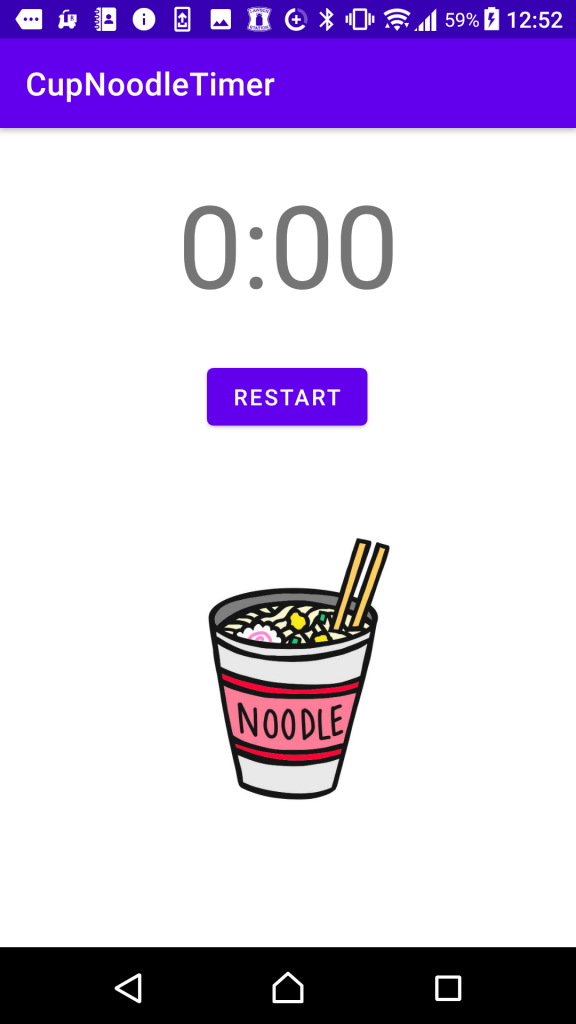
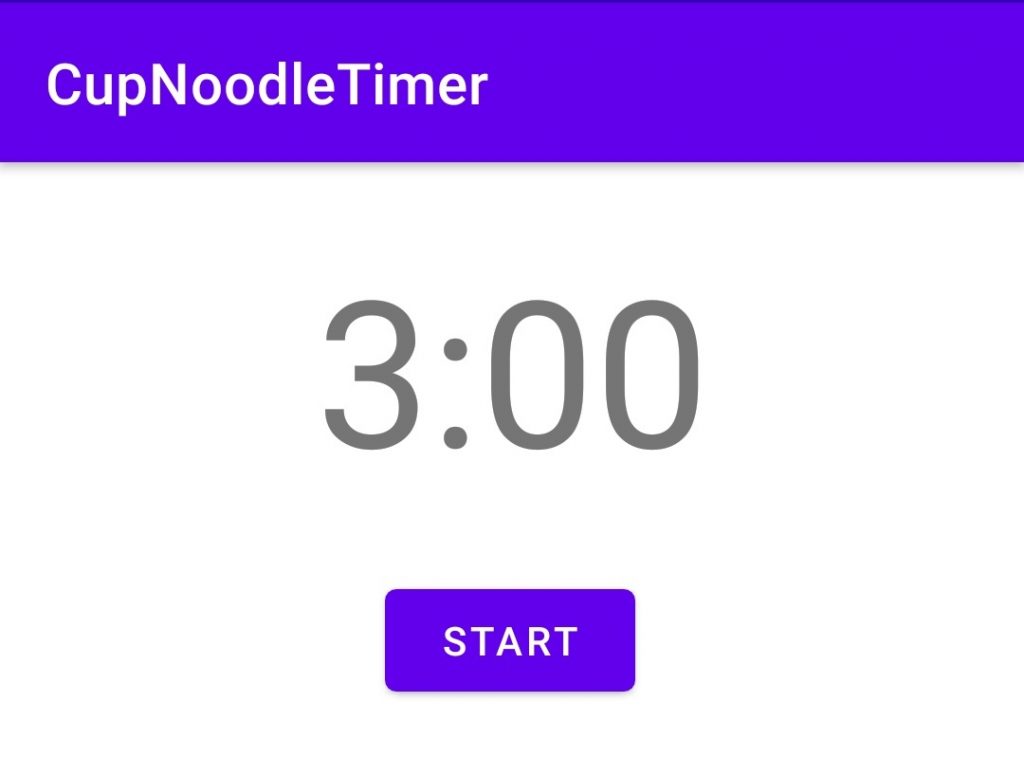
実行画面は以下のようなになった。左はタイマーが動いている時の画面で、右はタイマーが0になったときの画面。タイマーが0になったときだけ画像を表示させることが出来ている。
参考文献
今回は以下のサイトを参考にさせて頂きましたm(_ _)m
ImageView | Android デベロッパー | Android Developers
[Android & Kotlin] 画像を ImageView で表示させる3つの方法
Androidアプリをつくって遊ぼう日記まとめ
以下にAndoirdアプリで遊んでみた軌跡を残しています。興味があればのぞいてみてください。